You might be just starting with Python, or perhaps you are looking for a quick way to start running Python code. This article will explain to you how you can use the Python Anaconda Distribution to quickly get started. I will explain what Anaconda is, why you should use it to install Python, and how you can start coding after installing Anaconda.

What is Anaconda for Python
Anaconda is a Python Distribution that simplifies the installation of Python and its different packages. It specifically targets data science processes such as machine learning, predictive modeling, and big data analysis. When you install Anaconda for Python it comes with the most popular data science packages such as TensorFlow, NumPy, Pandas, Matplotlib, and many more.
Why you should use Anaconda
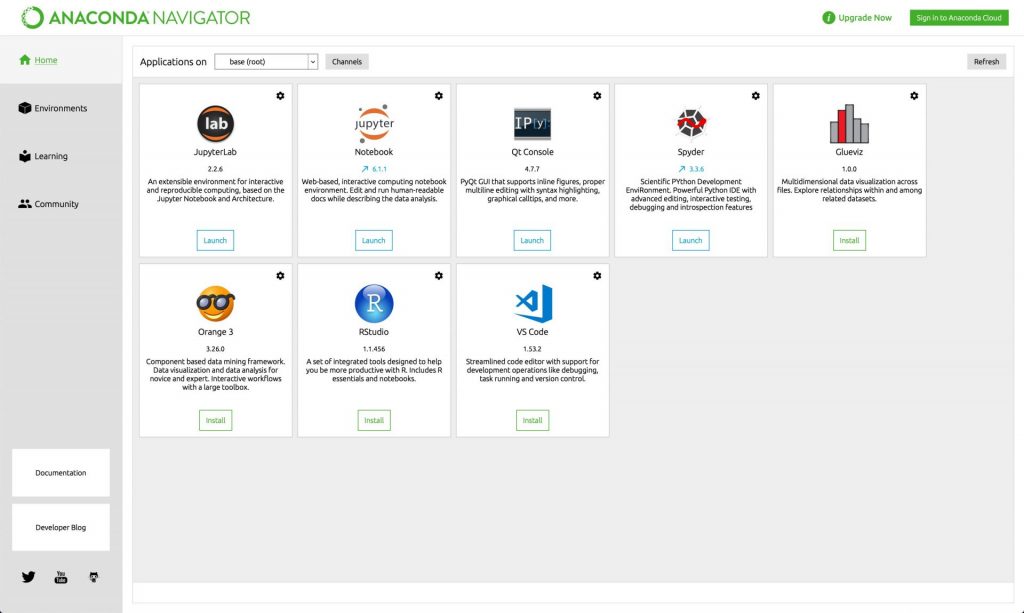
First of all, installing Python using Anaconda is much easier than going into your terminal/command line. Not everyone is confident in using the command line, especially if you are just starting with coding. With Anaconda you can install a program on your computer just like you would install any other program. Even after installing, the Anaconda Navigator provides you a User Interface where you can choose the relevant programs (see screenshot below).

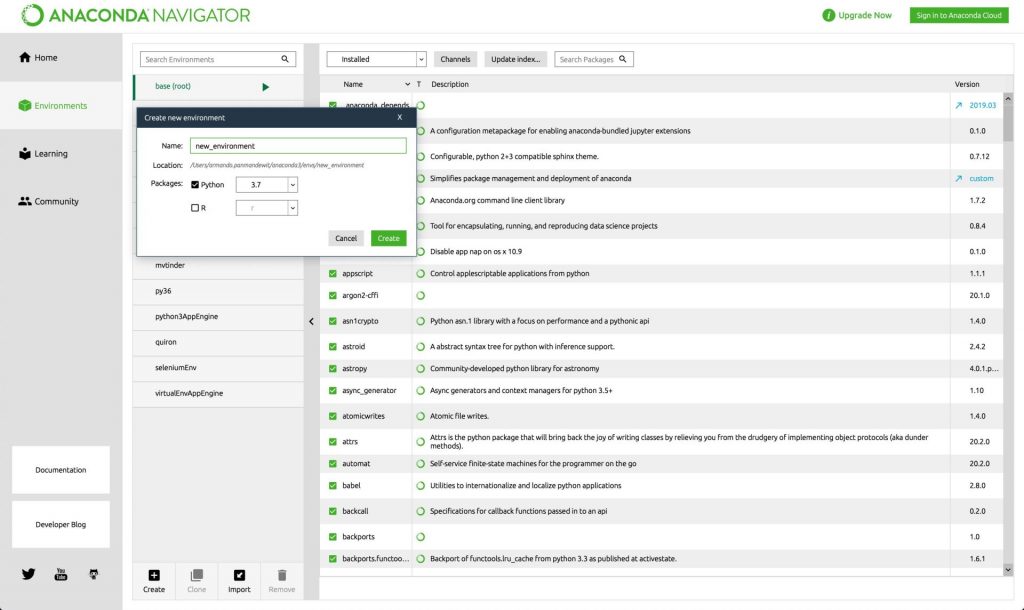
Moreover, Anaconda facilitates the management of environments. Environments are used to separate your packages whenever you are working on multiple projects. This way you make sure that each project only has the relevant packages installed. See below an example of creating an environment called new_environment and subsequently activating this environment using the Anaconda Navigator interface. Any package that you install is then only installed within that environment.

Alternatively, you can use the command line as follows:
$conda create --name new_environment
$conda activate new_environment
How to install Anaconda for Python
The Anaconda for Python Distribution is available for Mac, Windows, and Linux and can be downloaded here. If you are not interested in all these pre-installed packages, you can also try installing Miniconda, a minimal version of Anaconda. You can find the instructions for each platform in the following links
- Install Anaconda for Python (Mac)
- Install Anaconda for Python (Windows)
- Install Anaconda for Python (Linux)
Okay so you have installed Anaconda for Python, but how do you start running your Python code? The easiest way is for you to open a Jupyter Notebook using the Anaconda Navigator. This will open a new browser tab where you will see the folders on your computer. Then navigate to the folder you want to use as your product folder and click on “New” and then on “Python 3”. This will open a Jupyter Notebook where you can start running your code.

You can write whatever Python code you want to execute and then press SHIFT + ENTER to run the code (see screenshot below). If you need to install any other packages, you can write “!pip install <package>” within any cell and run the code.

I hope this article has shown you how easy it is to install Python using Anaconda. Maybe now you can start learning how to create a simple web scraper using Selenium, or create rotating proxies in Selenium. If you have any questions, do not hesitate to leave a comment below.
Pingback: Python | Dict to JSON - Automation Help
Pingback: Python Requests Library (HTTP requests) - Automation Help
Pingback: How to use the Google Analytics API Reporting with Python - Automation Help
Pingback: Google Analytics Data API (GA4) with Python [Extensive Guide] - Automation Help
Pingback: How To Send Automated Text Messages - Automation Help
Pingback: How to Send Automated Emails Using Python - Automation Help
Pingback: Python Internet Speed Test - Automation Help