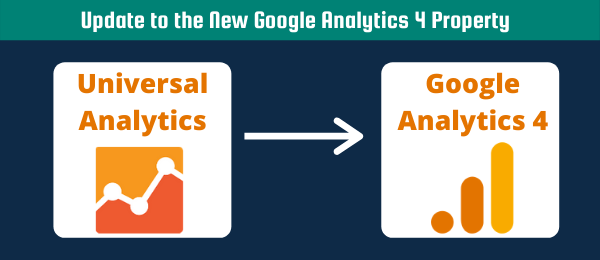
So Google has announced its new Google Analytics 4 (GA4). Which definitely was about time, as Universal Analytics dates from 2005. I am not sure if you know how old that is, but It was launched when “Don’t Cha” from the Pussycat dolls was still a popular song. But what if you are tracking your entire website using Google Tag Manager and you have tons of tags that now needed to be duplicated. In this article I will explain shortly what a Google Analytics 4 property is, but more importantly how you can update to the new Google Analytics 4 property using Google Tag Manager (the automated way!)
Google Analytics 4
By launching Google Analytics 4, Google is trying to make sure its data model supports the changing digital landscape. People are using their phones, and specifically apps, more and more. Previously with Universal Analytics, it was hard to track Apps, and it was almost impossible to track your apps and websites in the same property. Right now you can create just one property that has the same data structure/model for both apps as websites. Don’t worry if you don’t even have an app, this property works fine for only websites. I will list the most important changes (according to me) below.

Cross Device Tracking
Google Analytics 4 Properties do not have views anymore. Instead, a property now has data streams that can receive data from different sources. These sources can be either Websites or Apps (Android or iOS).

As mentioned in the intro, Google has introduced a way of tracking your users across apps and websites (cross-device). However, they are now using something called Google Signals. When users opt-in for Ad Personalisation, Google is able to create a holistic view of user interaction across different browsers and devices. In other words, if you are visiting a website with Google Chrome on your phone (while being logged in to your Google account and having enabled Ad Personalisation), and then you visit that same website with your desktop device (again while being logged in to your Google account), Google is able to tell that you are the same users. Amazing news for marketers, perhaps not so good news if you are concerned about being tracked on the internet (don’t forget that you can always opt-out for Ad Personalisation).
Event Tracking
If you love the familiar Event Category, Event Action, and Event Label, then unfortunately it is time to say goodbye to this data structure. With the new GA4 property you now only have Event Name. Which personally, I think this is the way to go when it comes to data collection. I would always recommend people to use an Object Verb naming convention for their events. For example, if you are tracking a buy button click, then the event name should be “buy button clicked”. In GA4 you can add more granular data to your events by adding event parameters. So perhaps you would like to track all buttons under the name “button clicked” and you then add an event parameter called “button_name” that contains information about which button was clicked.
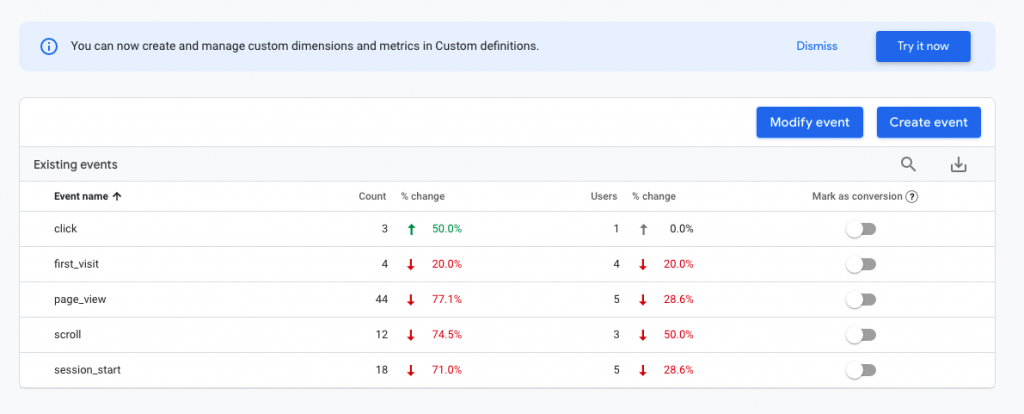
Page Views do not really exist anymore, and have made room for the “page viewed” event. Everything in GA4 is event based, so you will not have different types of tags such as pageview, social, timing etc.
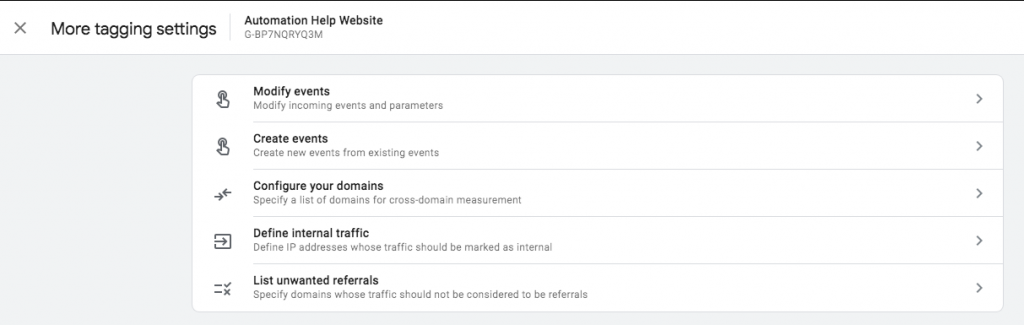
Additionally, you can now modify events before they enter you enter Google Analytics property. This allows you to quickly fix errors in your data collection, standardize your events and parameters, and customize your implementation without touching your actual tracking. You can also add an event based on an event, which actually looks a lot like implementing an event in Google Tag Manager (but then a bit more limited).
Machine Learning
Yes, of course, if you are launching something new in 2020, you will have to include some Machine Learning in your platform. Similar to the Universal Analytics property, within a GA4 property you will be able to ask “Analytics Intelligence” to show you some insights.
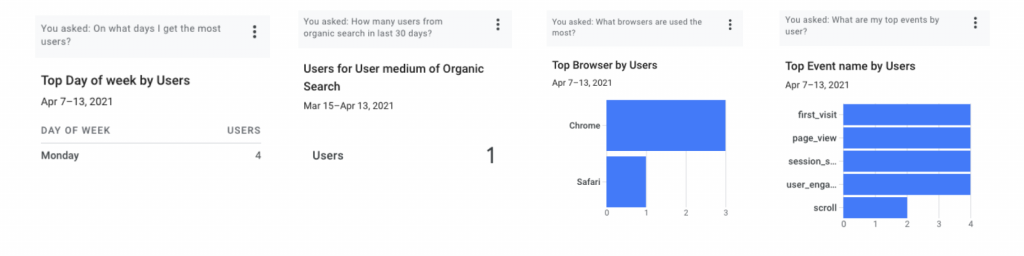
However on top of that, Google is now able to calculate your Customer Lifetime Value, warn you about specific trends, and find anomalies in your report.
Analysis Hub
If you have worked with Custom Report in Universal Analytics, then you know it was horrible and looked even worse. Right now there is a place where you can more easily create custom reports. With the Analysis Hub you can choose between reports for Exploration, Funnel Analysis, Segment Overlap, Path Analysis, User Explorer, Cohort Analysis, and Customer Lifetime Value. But there is even more, you can with the Template Gallery you can find Use Case and Vertical specific reports.

Continuous Development
Although Google Analytics 4 is already live, and Google wants you to start using this platform, it is far from ready. Google is still working on adding more features and editing existing. When GA4 first launched, custom dimensions and metrics were not available. However, Google has made them available again (probably after many complaints from existing users).
Update to the new Google Analytics 4 using Google Tag Manager
So perhaps you are eager to start collecting data in this new Google Analytics 4 property, or perhaps you are not convinced but you want to future-proof your tracking. If you are using Google Tag Manager, then your workspace is probably full of already existing Universal Analytics Tags. I would recommend you to keep these tags, but start double-tagging your website. Therefore, you will need to copy all existing tags and transform them to the new Google Analytics 4 Tag. I can imagine no one really wants to spend time doing this repetitive task, so I have created a tool to automate this process. Read below an automated approach on how toupdate to the new Google Analytics 4 Property using Google Tag Manager.
Migrate your Universal Analytics tags using GA4-Tag-Migrator
GA4-Tag-Migrator is a Web-App that I have created to easily transform your existing Universal Analytics tags to the new Google Analytics 4 Tags. This tool is great if you have multiple websites with many tags that needed to be migrated. In the section below I will explain to you the 4 easy steps to migrate your tags using this tool.
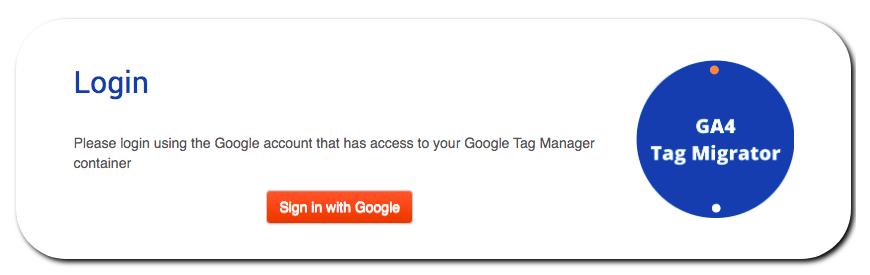
Step 1. Login
As the tool needs to be able to access your Google Tag Manager containers, you will need to login using your Google account. This Google account should be the one that is has access to the relevant containers
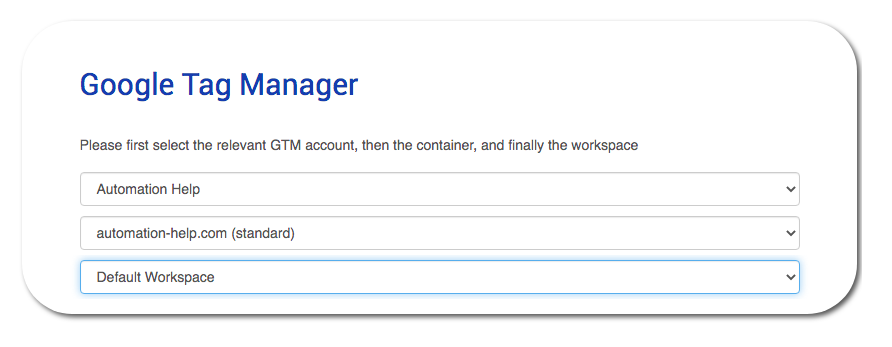
Step 2. Select the right container
From the dropdown start selecting your Google Tag Manager account. Subsequently, you can select the relevant property and eventually the Default Workspace. Normally, I would never advise someone to make changes in their Default Workspace, but for this tool, we can make an exception. Make sure this workspace is empty so you can immediately publish the workspace after migrating your tags.
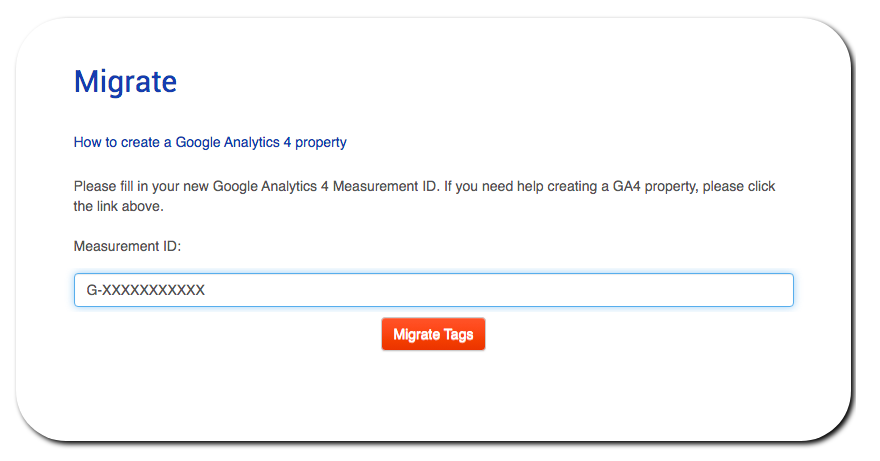
Step 3. Fill in your Measurement ID
You will now be able to see all the tags that will be migrated. We assume you have already created a Google Analytics 4 property. If you have not created one yet, please check out my article. A measurement ID is similar to the tracking ID of Universal Analytics and tells Google Tag Manager to which Google Analytics property it should the data.
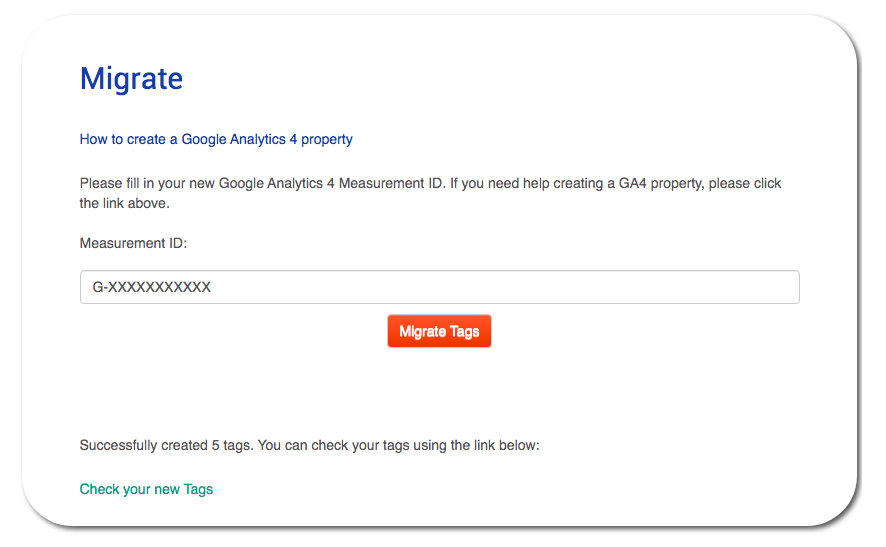
Step 4. Click Migrate
If you have filled in your measurement ID correctly, you should now be able to click the migrate button. Don’t forget to click “OK” on the pop-up button and just sit back and relax. All your tags will now be migrated. If you are migrating more than 25 tags, try to be patient as it might take a couple of minutes. In the meantime, just make sure you keep the browser tab open!
You now have migrated all your tags, if you want to migrate another website just go back to Step 2 and continue from there. Alternativelly, if you do not like the results, you can click on Delete Tags in the section at the end of the page.
Now you know how to update to the new Google Analytics 4 Property using Google Tag Manager. I hope you enjoyed saving your time by using the GA4 Tag Migrator. Please do let me know what you think of the tool by contacting me on LinkedIn or posting a comment below.
Pingback: Google Analytics Data API (GA4) with Python [Extensive Guide] - Automation Help
Pingback: Google Analytics 4 (GA4) - Tutorial [Extended Guide] - Automation Help